CustomTabs
Presentation
The information stored in customTabs can be retrieved with the myList and ExtraODT modules.
Settings
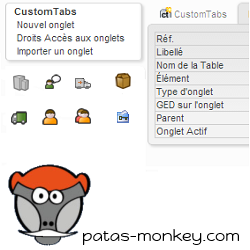
CustomTabs has no specific settings. Access to its features is found in the menu items Patas-tools > CustomTabs
List of tabs present
The menu title allows you to display the list of customTabs present in Dolibarr.
When you update the module (deactivation/activation) this also deactivates the customtabs, the button at the bottom of the list allows you to reactivate them en masse.
Creating a New Tab
Fields on the Tab Creation Page
Open the new tab creation page from the Patas-M Tools > CustomTabs > New Tab menu link:
| A tab can also be created from the tab list using the dedicated button |
- Label: The label will be displayed as the name of the tab displayed on the item pages.
- Table Name: The information you enter in a tab is saved in a table. Enter its name here.
- Element: Select from the drop-down list the element on whose records the tab will be added: third parties, contacts, products, warehouse, sales proposal, customer order, supplier order, customer invoice, supplier invoice, project, bank account, shipment, user, user group, member, VAT payment, or special expenses.
| CustomTabs is interfaced with the Equipment and Factory modules. It is therefore possible to create custom tabs on equipment and production order records. |
- Tab type: A tab can be a record or a list. Enter the type according to your needs:
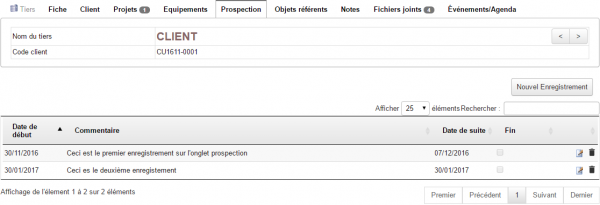
- A list-type tab only allows one record to be modified according to the settings declared in the input fields.
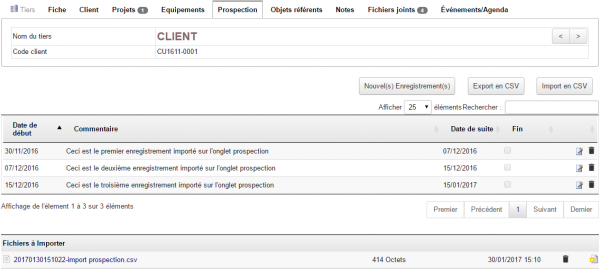
- A record-type tab allows the recording of multiple successive records.
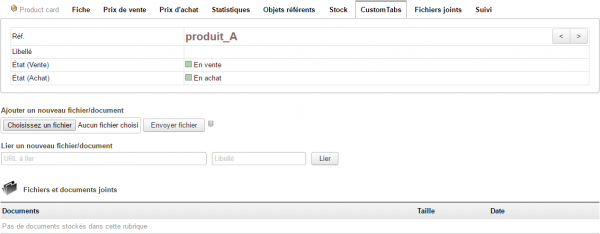
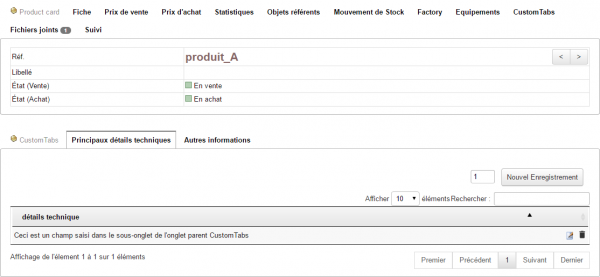
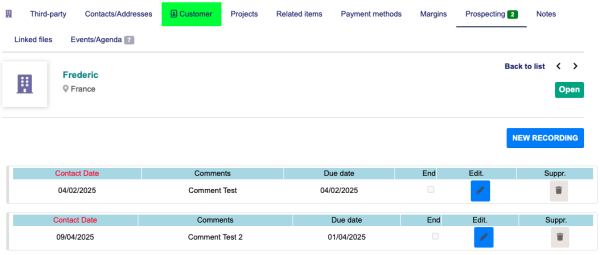
The tab type determines how data is displayed and saved. Depending on the type selected, the previously created tab will then display:
|
|

|
|
Example of creating a custom tab
Creation page
Let's create a tab to record third-party prospecting tracking.

|
Open the new tab creation page and enter the following data: |
Complete the first step of creating the tab by clicking the Create button.
|
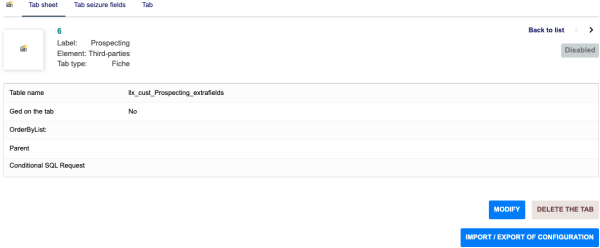
Once the tab is created, several new fields are displayed and can be modified when editing the tab:
|
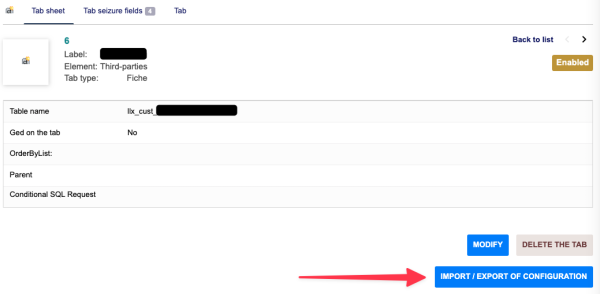
| The Edit button will allow you to edit the tab to modify various information. |
| The Import/Export button for the tab will generate the XML file that you can edit before copying and exporting it. |
| The Delete button will delete the tab from your database. Always deactivate a tab before deleting it. If you delete the tab without first deactivating it, it will remain in your database and on the item cards, but will be emptied of its content |
Tab Input Fields
From the page displayed after creating the additional tab, click the Tab Input Fields tab. The elements entered here will be the content lines of the custom tab added to the records of the element selected during creation.
To add a new field, click the New Attribute button.
Creating tab fields follows the procedure for creating and operating additional fields native to Dolibarr.
In the case of calculated fields, it will be possible to retrieve the id of the element to which the tab is associated with with the fk_element field
Continue creating the input fields using the following template:
To make the tab accessible from the Dolibarr menus, simply modify it to make it active and configure the access rights (see Configuring access rights to tabs below).
Tab Template
|
Entering a template is optional. If no template is entered, the default display is used. From the "Tab Template" tab, you can define your own display using HTML code. |

|
The screen displays a list of fields on the tab, which you can copy and paste.
Tip: Drag and drop can be used to copy the field code into the template's input area. |
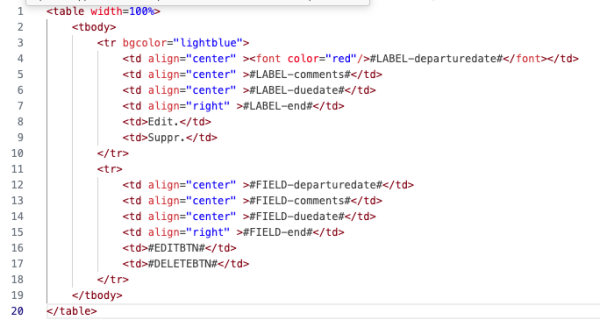
| To add edit and delete icons to the template, use the #EDITBTN# and #DELETEBTN# tags |
| The template is interpreted differently depending on the tab type: either block by block on a list tab, or for the entire page on a card tab |
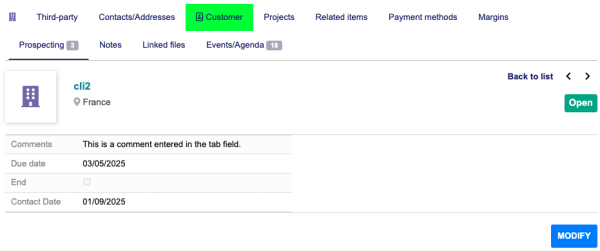
For example, you can enter the following template:
And you will get:
or
| If a field present in the table is not defined in the template, it will not be displayed |
Import/Export Tab
On the tab page, you can export the tab's settings and its fields to an XML file. You can then update a tab in the same way or import a new tab from scratch (see below in the documentation).
Calculated Fields and Concatenation
It is not necessarily easy to explain the use of calculated fields in customTabs, which is why I put here two examples of complex cases on calculated fields.
implode('/', array($object->array_options['options_urlcomp'], $objectoffield->array_options[$objectoffield->rowidextrafields]['options_no_contract'] ))
implode('-', array( ($tmpsoc = new Societe($db)) && ($tmpsoc->fetchNoCompute($objectoffield->array_options[$objectoffield->rowidextrafields]['options_soc'])) ? $tmpsoc->array_options['options_urlcomp']: '---', $objectoffield->array_options[$objectoffield->rowidextrafields]['options_no_contract']))
I would like to point out that it is possible to ask me for support services to carry out this type of thing.
User Access and Permissions on Tabs
Configuring Tab Access Rights
From the secondary menu entry Patas-Tools > CustomTabs > Tab Access Rights, configure user group access:
There are four access rights:
| The permissions vary depending on the tab type. On a form tab, the permissions for adding and deleting fields in the tab are not enabled. |
Behavior based on access rights
Blocked access ( )
)
A warning message will warn the user that they do not have the necessary permissions to view the tab's contents.
Read access but blocked from editing (
 )
)
Users in the group will be able to view the tab's fields, but will not be able to edit their contents.
Read Access and Edit Access (
 )
)
Users in the group will be able to view the tab, its contents, and edit them.
Conditional Display SQL Query
The processing query will condition the display of fields based on whether the object matches the query. It is then possible, for example, to display different fields depending on whether the object is a product or a service. Two values can be passed as parameters:
- #ID#: the ID of the main object on the page
- #USERID#: the ID of the active user
Operation
Enter here the display query applicable to the fields in the following example:
#SEL# allows you to replace the SELECT of the SQL query which will be blocked by Dolibarr's native security (SQL Injection)
#SEL# IF(fk_product_type=1, 1, 0) AS `read`, IF(fk_product_type=1, 1, 0) AS `write` FROM llx_product WHERE rowid=#ID#;
Read allows you to allow or disable the global display of the field Write allows you to allow or disable its modification (not necessary in the case of a button or a tab, etc.)
If the value is 0, the field is hidden; otherwise, it is displayed. Note: if you leave the field setting hidden, it will not appear regardless of the value.
Example
With the following myfield
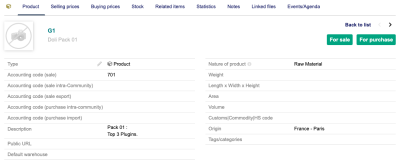
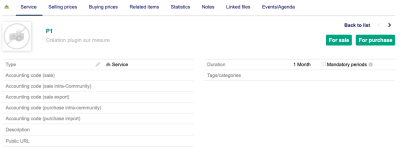
| We obtain the following information sheet for a product | While for the information sheet for a service |
Other Features
Import/Export a Tab and Its Content
Import/Export Tab Settings
You can save a tab and its fields by importing an XML file. From the Patas-M Tools > CustomTabs > Import a Tab page, paste the XML file into the input area and click the Start Import button:
Activate the tab from its page and it will be added to your item pages. This import feature allows you to avoid the steps of creating a custom tab. To import the content of a custom tab's input fields, use the content import feature.
Importing and Exporting List Content
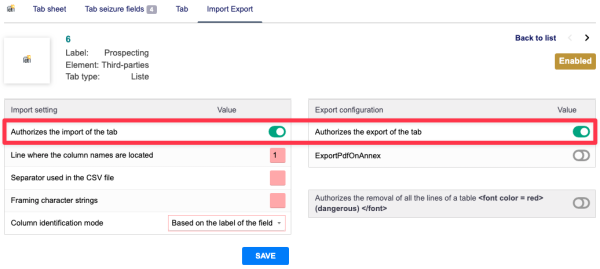
You can import the contents of tab fields by importing a .csv file. Tab imports and exports require these features to be enabled in the Import/Export tab of the custom tabs page.
| Importing/exporting tab content is only possible for list tabs |
|
Enable the tab content import feature first |
Next, declare the line of the .csv file containing the column name, the field separator used, the character used as a separator for the field contents, and the column identification method:
- Based on field label: The first line of your .csv file will contain the field label as displayed on the screen. In our example, Start Date, Comment, etc.
- Based on field name: The first line of your .csv file will contain the field code as recorded for each input field. In our example, Start Date, Comment, etc.
- Based on field order: The fields in the tab will be populated with the data as ordered in your .csv file.
| The "Allow deletion of all rows in a table (DANGEROUS)" setting will add a button to delete all rows in a customTabs. |
Let's take the following .csv file:
From the third-party file tab, click on the Import csv button:
Select the file to import, and Add file.
Then click on the ![]() icon to start the import
icon to start the import
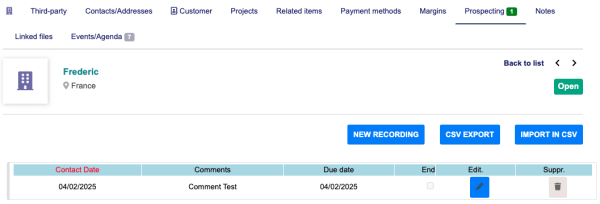
The customTabs will then display:
Dictionaries
CustomTabs allows you to create dictionaries of values to display in additional fields on item cards.
| This feature is available for List tabs only |
|
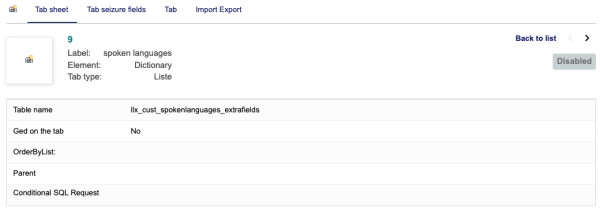
Create a new List tab for the Dictionary element and note the name given to the table. |

|
In the Tab Input Fields tab, create two fields. |
Activate the tab, set the access rights for user groups.

|
In the customTabs > Dictionaries secondary menu, open the newly created tab and add as many fields as needed. |
|
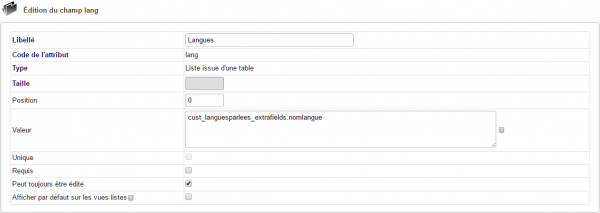
In the module configuration (third parties and contacts in our example), create an additional field in the desired element's record (contact) by selecting the list from a table or checklist from a table type. For the Value field, use the name of the table created in the previous step and complete it with the field name, i.e. cust_languesparlees_extrafields:nomlangue.
|
Your cards will then display the new additional field:

|
The advantage of using CustomTabs dictionaries is the speed of editing and duplication. Let's add the English language to our CustomTabs dictionary: The change made to the dictionary applies to all fields in all records that offer its values. |
and your contact cards will display:
ODT Management
It is possible to retrieve the values entered on form-type customTabs in ODT templates. To do this, use the {cust_<tab name>_<attribute name>} tag.
Frequently Asked Questions
General
This chapter lists the difficulties encountered with the module. You'll find answers to questions about its use. If you encounter an error other than those described below when using this module:
- Disable and re-enable the module,
- Check the ChangeLog to see if a new version has been released,
- Reinstall/update the module,
- Check that replacing native Dolibarr files is not necessary for the module to function properly.
- Check that no incompatibilities with another module are indicated. If applicable, follow our recommendations.
If, despite these steps, the error persists, contact us using the dedicated form (http://docs.patas-monkey.com/support/). This form is the preferred method of contact for any usage difficulties or bug reports. We also ask that you refrain from using multiple communication channels for the same item.
Tabs not/no longer appearing on your tabs
- Following an update to the module or the tabs themselves, even if your tabs indicate they are enabled, you will need to reactivate them by editing the "Active Tab" field and saving again.
- It is also possible to perform this operation for all tabs in one click using the "Reactivate Active Tabs" button in the CustomTabs list, accessible from the Patas-tools > CustomTabs > CustomTabs menu:
