« MyClock en » : différence entre les versions
Aller à la navigation
Aller à la recherche
Aucun résumé des modifications |
|||
| (13 versions intermédiaires par le même utilisateur non affichées) | |||
| Ligne 12 : | Ligne 12 : | ||
The appearance and content of MyClock widgets can be customized according to your tastes and needs. | The appearance and content of MyClock widgets can be customized according to your tastes and needs. | ||
|} | |} | ||
== | == Presentation == | ||
myClock | myClock is displayed on the Dolibarr side menu | ||
It is possible to define the interface (clock, pomodoro, tracker) that you want to display by default | |||
We select the interface by clicking on the associated icon | |||
{| class="wikitable" | {| class="wikitable" | ||
|- style="vertical-align:top;" | |- style="vertical-align:top;" | ||
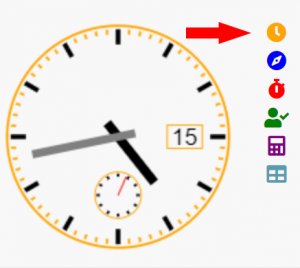
| [[File:Myclock-horloge.png|300px]] | | [[File:Myclock-horloge.png|300px]] | ||
| | | a clock with customizable display (skin and complications) | ||
|- style="vertical-align:top;" | |- style="vertical-align:top;" | ||
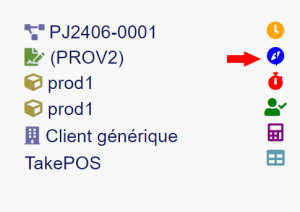
| [[File:Myclock-Configuration_breadcrump.png|300px]] | | [[File:Myclock-Configuration_breadcrump.png|300px]] | ||
| | | a breadcrump or Ariadne's thread allowing you to quickly return to an element already visited | ||
|- style="vertical-align:top;" | |- style="vertical-align:top;" | ||
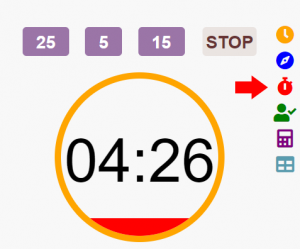
| [[File:Myclock-Configuration_Widgets.png|300px]] | | [[File:Myclock-Configuration_Widgets.png|300px]] | ||
| un pomodoro permettant de lancer des timer d'activité | | un pomodoro permettant de lancer des timer d'activité | ||
|- style="vertical-align:top;" | |- style="vertical-align:top;" | ||
| [[File:Myclock- | | [[File:Myclock-tracker_en.png|300px]] | ||
| | | a task score to know its activity time | ||
|- style="vertical-align:top;" | |- style="vertical-align:top;" | ||
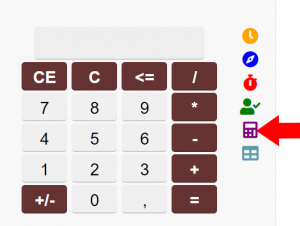
| [[File:Myclock-Configuration_Calculatrice.png|300px]] | | [[File:Myclock-Configuration_Calculatrice.png|300px]] | ||
| | |a small calculator to perform simple calculations | ||
|- style="vertical-align:top;" | |- style="vertical-align:top;" | ||
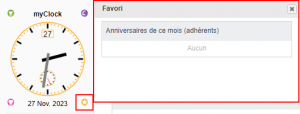
| [[File:Myclock-Configuration_Evenements.png|300px]] | | [[File:Myclock-Configuration_Evenements.png|300px]] | ||
| | | a window displaying time management widgets (calendar, intervention, task)) | ||
|} | |} | ||
== | == Setting == | ||
Access to the module administration is done by clicking on the icon at the end of the line in the list of modules. | |||
There are 4 tabs: | |||
{| class="wikitable" | {| class="wikitable" | ||
|- style="vertical-align:top;" | |- style="vertical-align:top;" | ||
| [[File:Myclock-Configuration- | | [[File:Myclock-Configuration-tab_en.png|500px]] | ||
| | | | ||
* | * The main tab allows you to configure the clock display | ||
* | * The "widget" tab, the boxes that you want to display in the widget window | ||
* | * The "event" tab, the list of events that will be presented in the event window | ||
* | * The "about" tab presents the developments of the modules | ||
|} | |} | ||
=== | === Main tab === | ||
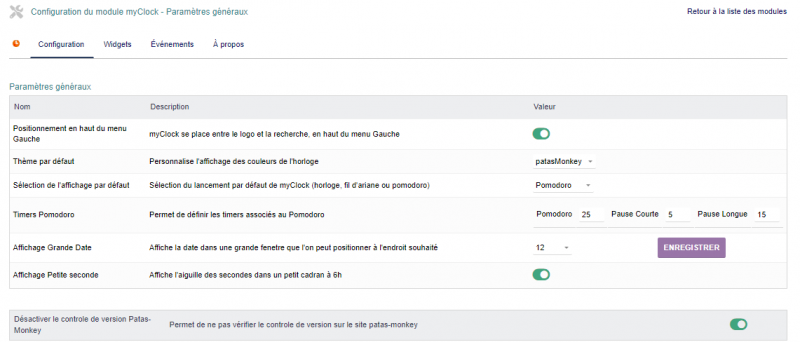
From the main screen it is possible to configure | |||
{| class="wikitable" | {| class="wikitable" | ||
|- style="vertical-align:top;" | |- style="vertical-align:top;" | ||
| [[File:myclock-configuration1.png|800px]] | | [[File:myclock-configuration1.png|800px]] | ||
| | | | ||
* | * If you want to position the clock above the left menus or below | ||
* | * The theme of the clock | ||
* | * The function that you want to display by default (the clock, breadcrumbs, pomodoro | ||
* | * the times associated with the pomorodoro (work, short and long break) | ||
* | * the display of complications on the clock (Large Date, Small Second) | ||
to configure the complications, it is necessary to refresh the page cache ([Ctrl]+[F5]) | |||
|} | |} | ||
Dernière version du 4 novembre 2024 à 15:56
Presentation
myClock is displayed on the Dolibarr side menu It is possible to define the interface (clock, pomodoro, tracker) that you want to display by default We select the interface by clicking on the associated icon
Setting
Access to the module administration is done by clicking on the icon at the end of the line in the list of modules. There are 4 tabs:
Main tab
From the main screen it is possible to configure
